Once you’ve figured out a few geometric basics, you’re ready to learn all about pathways: those lines that go over and under each other to create a three-dimensional effect.

Drawing pathways is a labor of love, but – to me – worth the extra work when you’re playing with a design and want to emphasize the lines rather than the shapes.
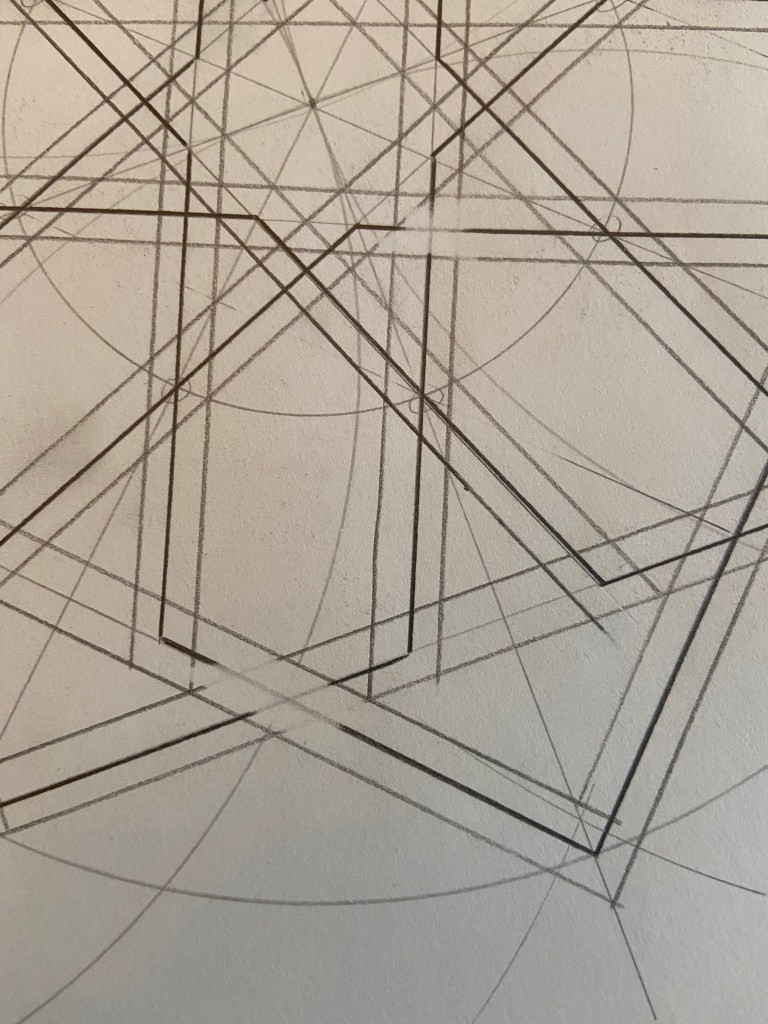
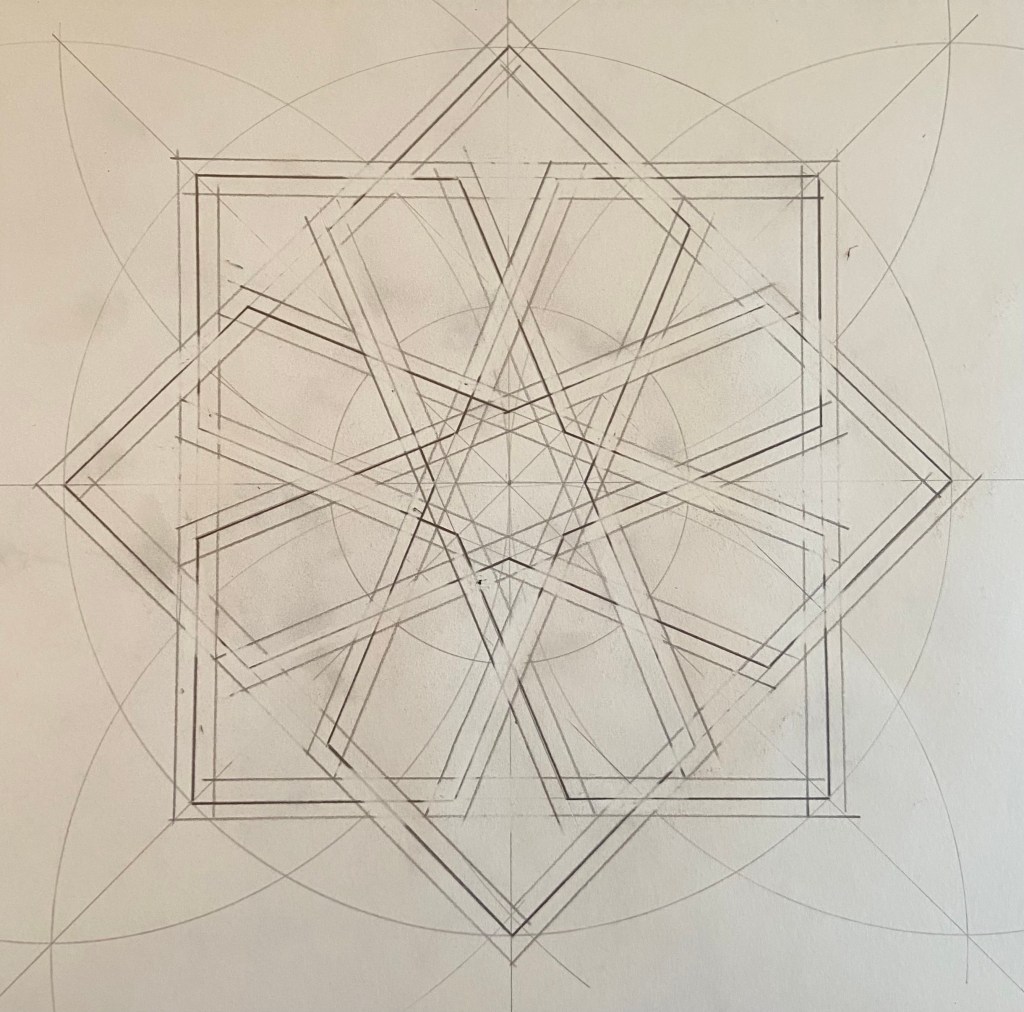
Start with a pattern that you’ve already drawn. Maybe even this one from a few days ago.

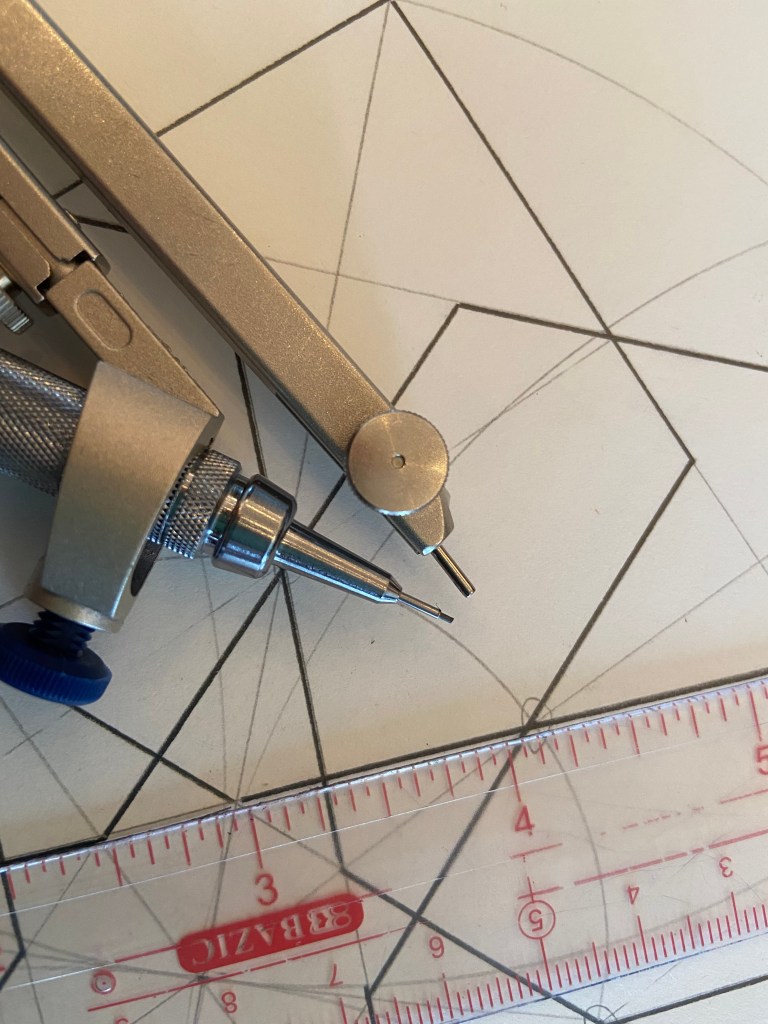
If you’re working with pencil and paper, there are a few ways to go about it. You can use a small clear quilting ruler and set one of the lines – depending on the thickness that you’re going for – along your pattern and use a pencil to draw the fatter lines.

Or (my favorite way to do it!) flip the point of your compass around to the blunt edge and set your compass to your preferred thickness. Place your straight edge on a line, set the blunt side of the compass against the ruler, and draw – your lead will always be that fixed width away from the pattern line!

If you’re drawing digitally, increase the thickness of your line and then “trace” the outside of this fatter line.
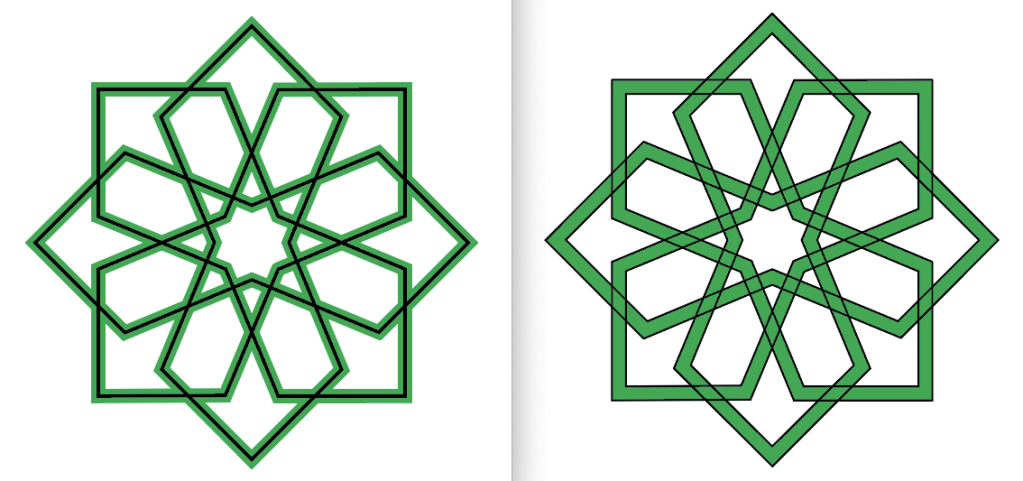
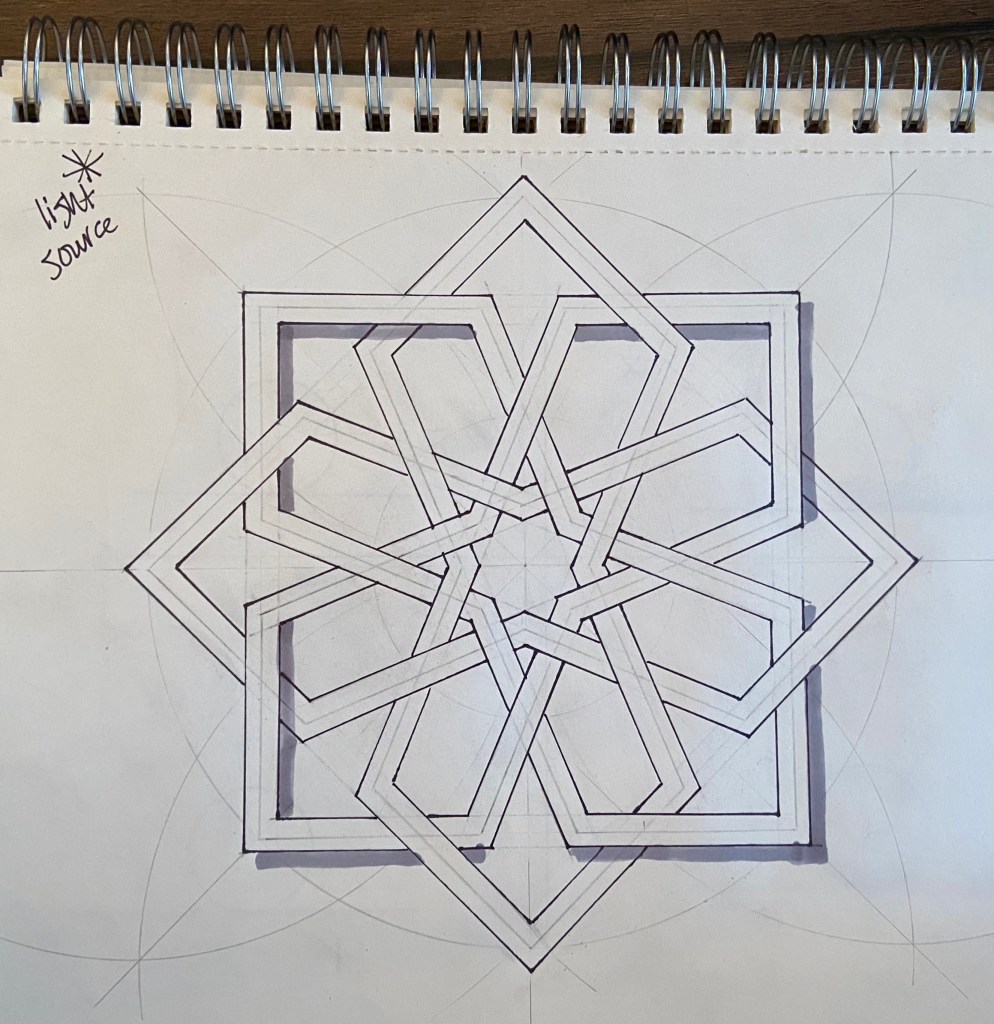
No matter whether you’re drawing physically or digitally, you’ll end up with a drawing with thicker lines, but none of that fancy weaving that we’re aiming for. Here’s where an eraser – and your brain – come into play.
Choose one line segment to start with. A line segment is a piece of line that comes out from under a line, goes over another one, and then dips back under a third. Erase the point where the two ends of this segment go under other lines. Then erase the other line where it’s hidden under this segment. Go around the pattern, dong the same with all the other identical segments.
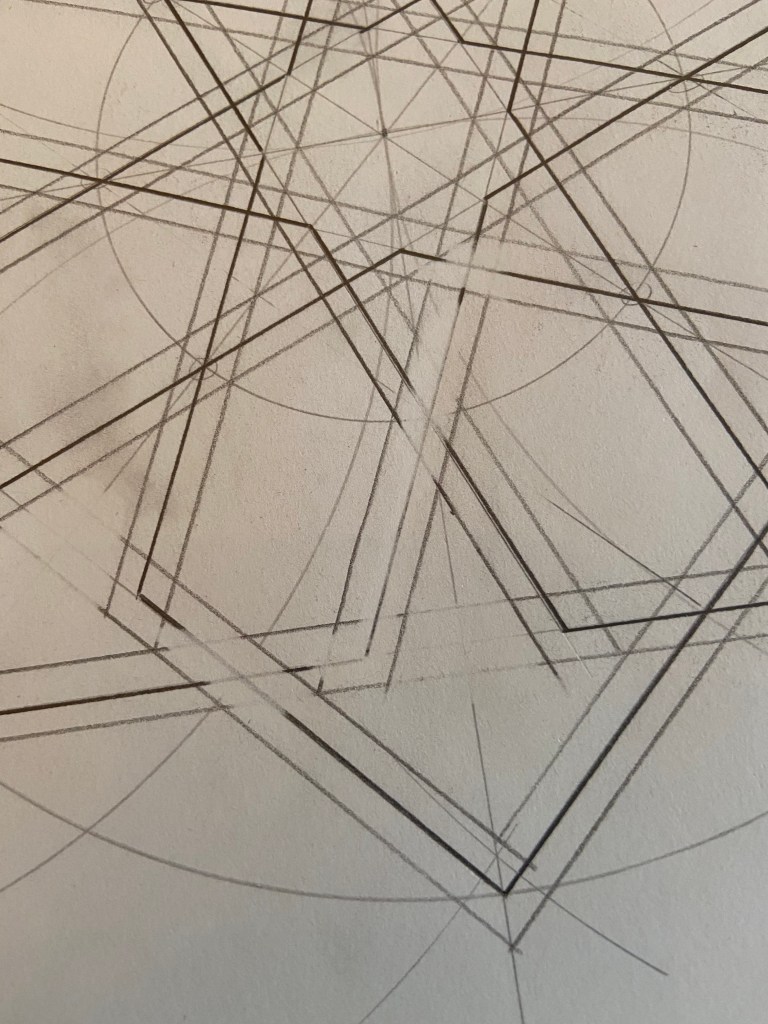
Continue picking segments, erasing, and going around the design until you’re all finished. I find that starting from outside and going in works best, but as long as you work methodically, you’ll get the same final result.

But maybe you want to go further and add more dimensionality. Just draw in shadows! First decide on the location on your light source; it’s easy if it’s to the top-left or top-right and even easier if it’s at a 45º angle. In this example, you light source is to the top-left, meaning that all the shadows will be to the right and the bottom.

I start by adding in the most straight-forward shadows: those below horizontal lines and those to the right of vertical lines. Next, I imagine a line that starts at my light source and goes to the floor that my design is sitting on. Any line whose angle is steeper than that line gets a shadow; any line that is more gradual doesn’t.
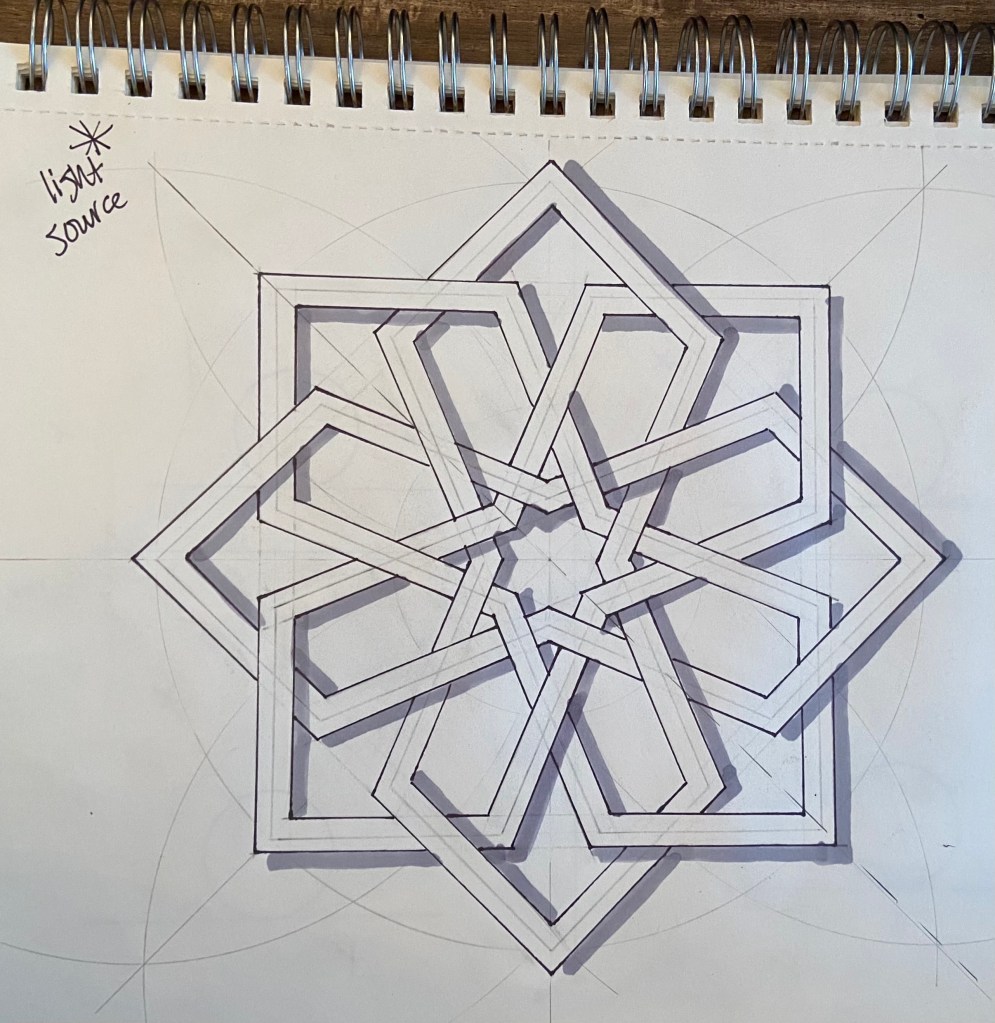
I missed a shadow in this one; see if you can spot it.
Finally, I add just a tiny bit of differentiation in the length of the shadows in the actual design and those behind the design.


Geometry Spot is a lively platform focused on delving into shapes, sizes, and spatial properties. Tailored for students, educators, and geometry aficionados alike, it provides comprehensive lessons, visual aids, and interactive activities to enrich comprehension of geometric principles. From fundamental concepts like triangles and circles to more advanced topics such as three-dimensional shapes and transformations, Geometry Spot serves as the ultimate destination for mastering geometry.
LikeLike
Geometry Spot School offers exceptional geometry education through a wide range of courses and resources. By focusing on interactive and practical learning, it ensures that geometry is both engaging and easy to understand for students at all levels. Whether you’re just starting out or looking to advance your skills, Geometry Spot School provides the essential tools and support for your success.
LikeLike